You stare at the blank paper. Or the pile of yarn. Or that half-unpacked craft kit collecting dust.
You want to make something real. Something beautiful. Something yours.
But then you freeze.
Where do you even start? What if it’s too hard? What if you waste time and money on junk materials?
I’ve been there. More times than I’ll admit.
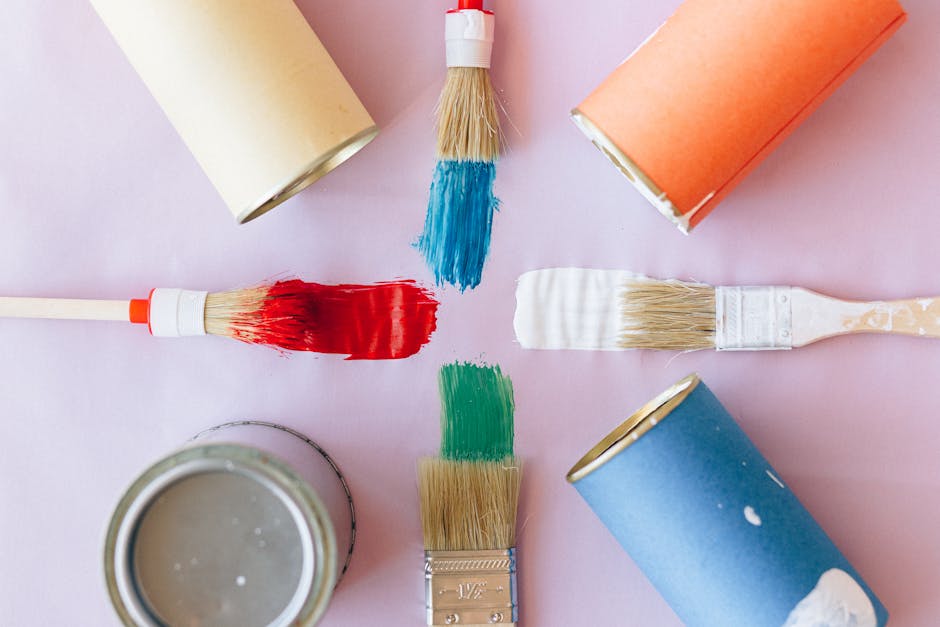
I love crafting (not) as a hobby, but as breathing. And I’ve spent years testing tools, threads, paints, and kits until I found what actually works.
Not flashy stuff. Not gimmicks. Just honest, joyful making.
That’s why Playful Crafts Lwmfcrafts exists.
This isn’t another list of impossible projects. It’s a no-fluff guide to real ideas you can finish (and) love. This weekend.
Beginner or seasoned. It doesn’t matter.
You’ll get clear steps. Smart shortcuts. And projects that feel good to make.
Why Lwmfcrafts Feels Like Cheating
I used to buy craft supplies based on price. Then I ruined three greeting cards because the ink bled. And my watercolor sketch faded in sunlight like it was embarrassed.
That’s when I found Lwmfcrafts.
It’s not just pigment or paper or glue. It’s reliability you can feel. The colors pop like they’ve had espresso.
They don’t fade. Not after a week, not after a year (I checked. My daughter’s sun-catcher still glows like new).
The tools? Designed for hands, not brochures. Scissors cut clean without sawing.
Brushes hold their shape. No more re-wrapping tape because it won’t stick.
You know that sinking feeling when your project looks great at 8 p.m. and sad by 8:15 a.m.? That’s cheap materials talking. Lwmfcrafts stops that conversation before it starts.
I tried the Playful Crafts Lwmfcrafts collection first. Bright, bold, zero pretense. Perfect for kids’ projects or your own messy joy.
Quality isn’t luxury here. It’s the baseline.
You’ll spend less time fixing mistakes. More time making things that last.
And yes (it) costs a little more upfront. But ask yourself: how many times have you tossed a half-finished project because the supplies quit on you?
Not anymore.
Your First Masterpiece: A Quote Canvas That Doesn’t Suck
I tried this on a Tuesday. No fancy tools. No art degree.
Just me, a $12 canvas, and Lwmfcrafts vinyl stencils.
It looked expensive. People asked where I bought it.
You can do the same in under 90 minutes.
What You’ll Need:
- A stretched canvas (12×16 works great)
- Acrylic paint (one) base color, one quote color
- A foam brush or small flat brush
- Painter’s tape
- Lwmfcrafts vinyl stencils (get the “Minimalist Serif” set. Clean lines, no bleed)
- A credit card or squeegee
- Paint your canvas with the base color. Let it dry completely.
(Yes, really. Touch it. If it’s cool, wait five more minutes.)
2.
Tape the canvas to a table. Peel the stencil backing and press it down firmly. Start at one edge and smooth outward.
No bubbles. 3. Lightly dab paint over the stencil with the foam brush. Don’t swipe.
Don’t press hard. Just tap. 4. Lift the stencil straight up while the paint is still wet.
Don’t slide it. 5. Let it dry. Done.
Hang it. Feel smug.
Pro-Tip: For extra sharp lines, paint a thin layer of your base color over the stencil edges first to seal them before applying your main color.
This isn’t “crafting.” It’s visual punctuation. A pause in your hallway. A breath in your bedroom.
Playful Crafts Lwmfcrafts stencils are cut precisely (no) flaking, no ghosting. I’ve used cheaper ones. They fail.
These don’t.
I wrote more about this in Light Crafts Lwmfcrafts.
You don’t need talent. You need patience with step 2 and honesty about step 1 drying time.
That quote on your wall? It doesn’t have to be deep. Mine says “Breathe.” It’s enough.
Start small. Use black on white. Then go wild.
Your wall is waiting. Not for perfection. For you.
Level Up: Make Jewelry That Doesn’t Look Like Everyone Else’s
I used to think resin jewelry had to be clear, shiny, and boring. Then I tried the Lwmfcrafts resin kits. Big mistake.
In the best way.
You don’t need a studio. Just a clean table, gloves, and ten minutes of focus.
Designing Your Piece
Start with color. Not just a color. Two or three that actually talk to each other.
I mix acrylic paint into resin drops (not) too much, or it clouds. Try cobalt blue + white for soft ombre. Or rust + black for something moody.
(Yes, black resin is a thing. Yes, it’s dramatic.)
Want depth? Embed dried flowers, tiny charms, or even handwritten notes cut small. Press them in after your first layer cures (not) before.
Otherwise they float or sink weirdly.
The Finishing Touches
Sand edges lightly with 400-grit paper. Wipe dust off. Then pour a final top coat.
Let it cure fully. 24 hours minimum. Rush this and you’ll get sticky spots. I’ve done it.
Don’t be me.
You can also drill holes after curing if you want to hang things. Use a low-speed drill and go slow. Resin cracks easy if you force it.
Try swapping out fabric paints for metallic pens on tote bags. Or use resin on wood slices instead of molds. It’s not precious.
It’s play.
That’s where Light Crafts Lwmfcrafts comes in. They show how to push past “cute” into “I made this and it feels like me.”
Playful Crafts Lwmfcrafts isn’t about matching your friend’s bracelet. It’s about making something that makes you pause and say “Yeah. That’s mine.”
Use less resin than you think you need. Seriously. It spreads.
Wear your mistakes. They’re part of the piece now.
Your first try won’t be perfect. Mine wasn’t. I wore the lopsided one for two weeks straight.
It still gets compliments.
So go ahead. Mix wrong. Glue something crooked.
Add glitter you swore you’d never touch again.
Just start.
Pro Secrets for Flawless Crafting Results Every Time
I’ve ruined more projects than I care to admit. Mostly because I rushed.
Tip one: Combine materials like you mean it. Glitter in paint? Stir it after the base coat dries (not) before.
Vinyl on raw wood? Sand first, wipe down, then heat-press. Otherwise it lifts like a bad tattoo.
You think it’s fine. You’re wrong.
Tip two: Prep isn’t optional. Wash fabric before cutting. Sand wood until it feels smooth, not just looks smooth.
Wipe surfaces with isopropyl alcohol. Not water (if) you want glue or paint to stick.
Water leaves residue. Alcohol doesn’t.
Tip three: Seal every finished piece. Spray sealant works for paper and glitter. Polyurethane wins for wood.
Matte or gloss depends on your mood. Not the project.
Skip sealing and watch your work fade, chip, or peel in two weeks.
Playful Crafts Lwmfcrafts thrives when you treat prep and protection like non-negotiable steps (not) afterthoughts.
Want more real-world craft setups that actually hold up? Check out this post.
Your Hands Are Ready. Start Now.
I’ve been stuck too. That itch to make something real. Then staring at blank paper or half-open supplies.
You don’t need permission. You don’t need perfect conditions. You just need to move your hands.
Playful Crafts Lwmfcrafts gives you the first real step. Not theory, not fluff, just doable projects and clear tips.
You already know which one calls to you. That little bird mobile. The stitched pouch.
The clay coaster set.
Pick it. Not tomorrow. Not when you “feel inspired.” Right now.
Grab your Lwmfcrafts supplies. Open the guide. Follow one project start-to-finish.
That’s how momentum begins.
That’s how “I can’t” turns into “I made this.”
Your first finished piece is waiting.
Go make it.